Yes have been a while didn't have a post...
It is getting harder to create post, because everybody is creating excellent posts on different areas and don't want to repeat info but...
I was surprised by the quantity of persons that don't know and asking me how to configure the Document Library to have links,
i know this not that hard topic and you already know some posts talking about this, so i will create this guide for this persons that are learning on SharePoint.
To start we need to access our Document Library and select the Ribbon option Library Settings if you have the correct permissions.
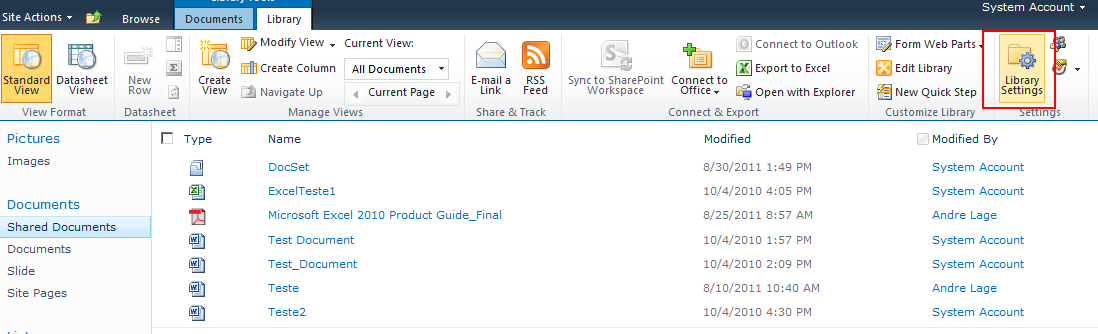
After you access the Library settings you will need to access Advanced Settings.
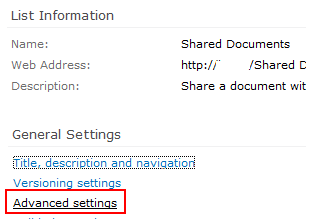
On Advanced Settings you will have the option “content Types” you will need to select the option “Allow management of content types” as “Yes”, this will allow you to add more content types to your Document Library.
After you accept this option you can add the Content types, there will be the associated to Links in document Library.
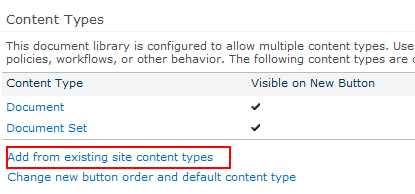
The content Type “Link to a Document” is the correct one to associate, after you select you will need to “Add” to associate with Document Library.
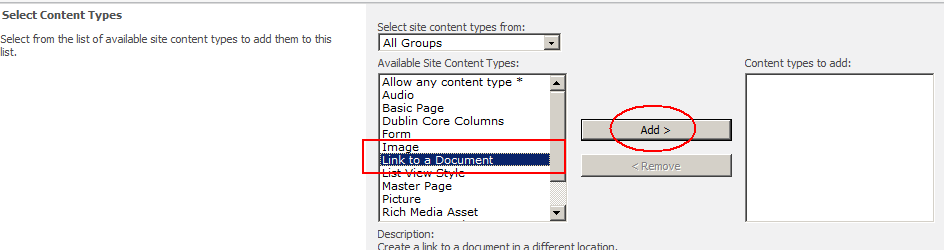
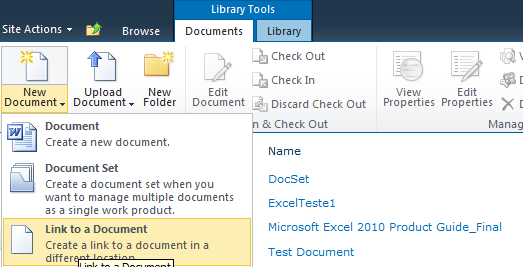
After the Content Type is added, a new option will appear in the Ribbon, if you select the Document Library page and select in Ribbon “Documents>New Document” will appear a new option “Link to a Document”.


Hope this help configure your Document Library to have content types with Links.
Regards
Rashid Imran Bilgrami
CEO Best visualization
http:\\www.bestvisualization.com
It is getting harder to create post, because everybody is creating excellent posts on different areas and don't want to repeat info but...
I was surprised by the quantity of persons that don't know and asking me how to configure the Document Library to have links,
i know this not that hard topic and you already know some posts talking about this, so i will create this guide for this persons that are learning on SharePoint.
To start we need to access our Document Library and select the Ribbon option Library Settings if you have the correct permissions.
After you access the Library settings you will need to access Advanced Settings.
On Advanced Settings you will have the option “content Types” you will need to select the option “Allow management of content types” as “Yes”, this will allow you to add more content types to your Document Library.
After you accept this option you can add the Content types, there will be the associated to Links in document Library.
The content Type “Link to a Document” is the correct one to associate, after you select you will need to “Add” to associate with Document Library.
After the Content Type is added, a new option will appear in the Ribbon, if you select the Document Library page and select in Ribbon “Documents>New Document” will appear a new option “Link to a Document”.
After you select this option you can add the document Name that will be displayed in the Document Library View and the url link to the document.
After this option is added the new item will be displayed as a link.
.Hope this help configure your Document Library to have content types with Links.
Regards
Rashid Imran Bilgrami
CEO Best visualization
http:\\www.bestvisualization.com
Comments
Post a Comment