Dear All,
if you want to conifgure the user profile here is the steps
Original Post
Pre-request Items need to be check
SharePoint Timer service run with local administrator account
The Pool account & FIM service account must have the Active Directory "Replicating Directory Changes"
To make sure your user have Replicating Directory Changes have a permission use the below 10 steps
//Start Process here
Setting permissions by using the ACL editor
1. Open the Active Directory Users and Computers snap-in
2. On the View menu, click Advanced Features.
3. Right-click the domain object, such as "company.com", and then click Properties.
4. On the Security tab, if the desired user account is not listed, click Add; if the desired user account is listed, proceed to step 7.
5. In the Select Users, Computers, or Groups dialog box, select the desired user account, and then click Add.
6. Click OK to return to the Properties dialog box.
7. Click the desired user account.
8. Click to select the Replicating Directory Changes check box from the list.
9. Click Apply, and then click OK.
10. Close the snap-in.
//End Process here
Setup and Start the SharePoint 2013 User Profile Service (UPS)
Verify the FIM service by using this tool
C:\Program Files\Microsoft Office Servers\14.0\Synchronization Service\UIShell\miisclient.exe
Start the User Profile Service:
Open "Central Administration"
Login as the SharePoint Install account
This account must have dbcreate and securityadmin server roles on the SQL Server {SQL Server 2012 Name}
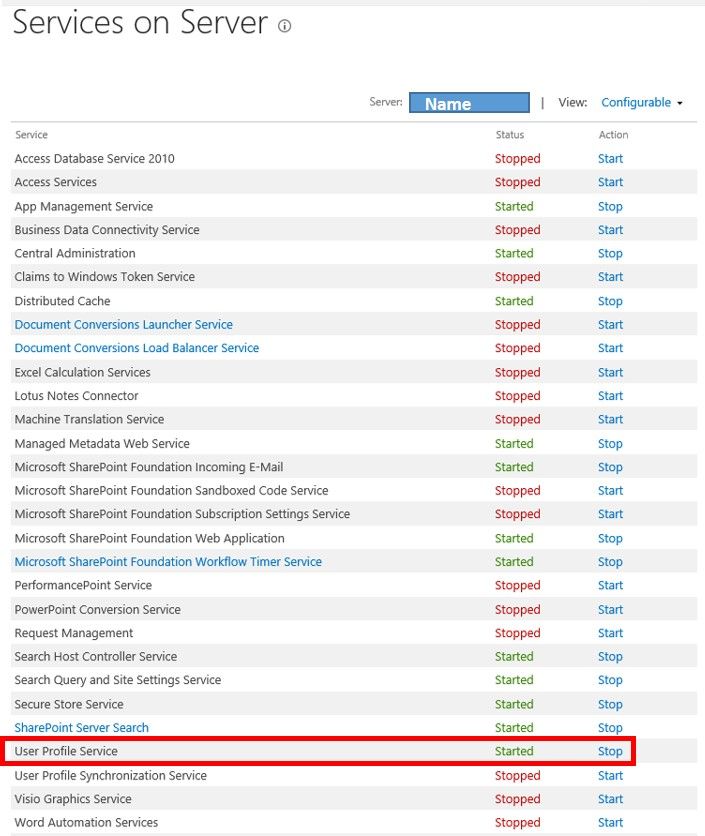
Click “Manage services on server”, under “System Settings”
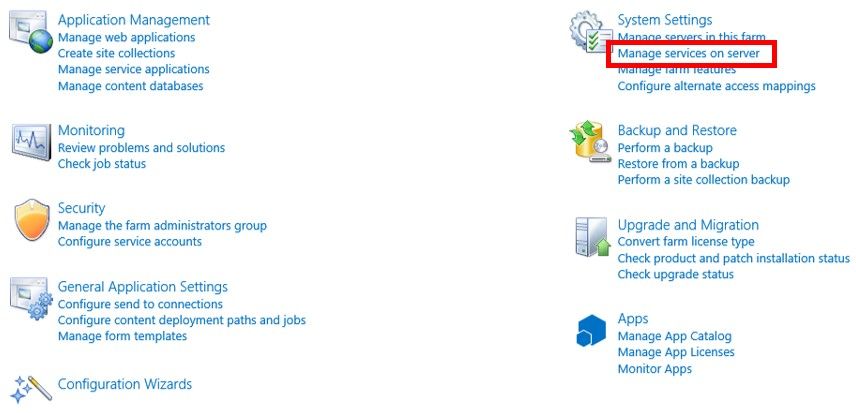
Find "User Profile Service"
Click "Start", on the right
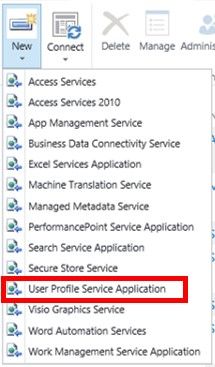
Create the User Profile Service (UPS) Application:
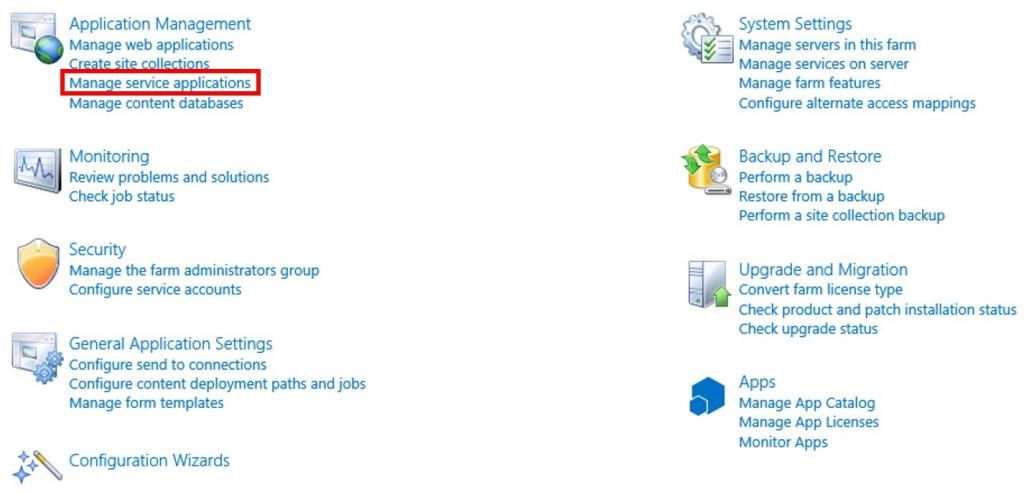
Open "Central Administration"
Click “Manage service applications”, under “Application Management”
Click "New"
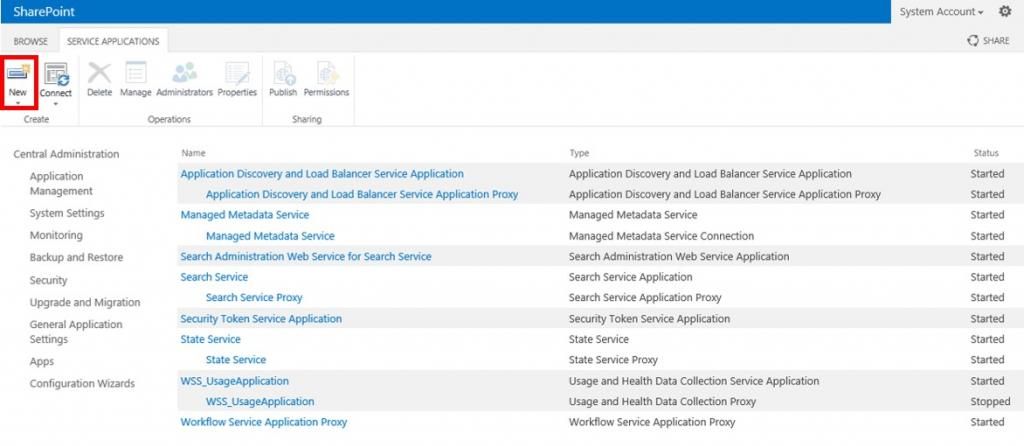
Select "User Profile Service Application"
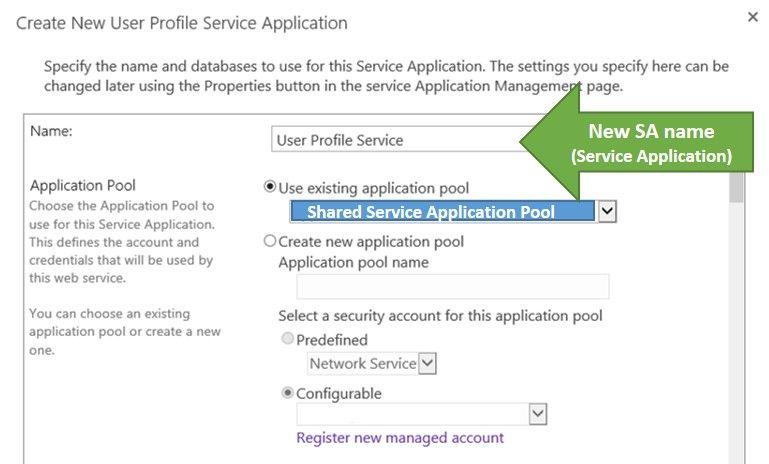
Fill in the related fields
(If I haven't mentioned the field, it has the default settings)
a. Name: User Profile Service
b. Application Pool: Use existing application pool: Shared Services
c. Profile Database:
i. Database Server: {SQL Server 2012 Name}
ii. Database Name: {Database}_UserProfile

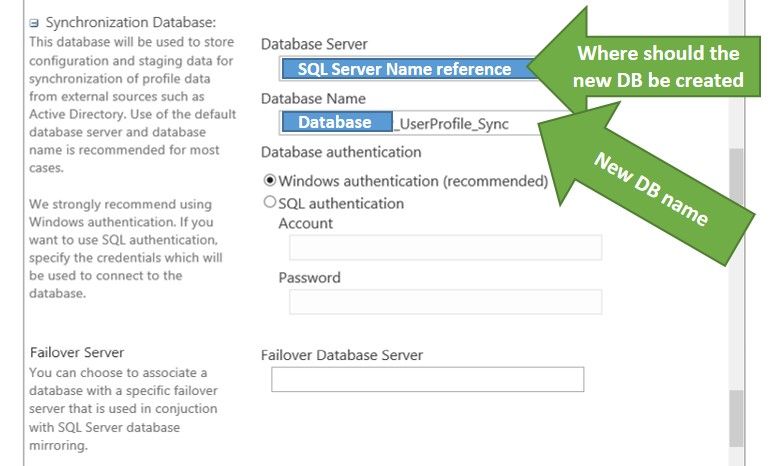
d. Synchronization Database:
i. Database Server: {SQL Server 2012 Name}
ii. Database Name: {Database}_UserProfile_Sync
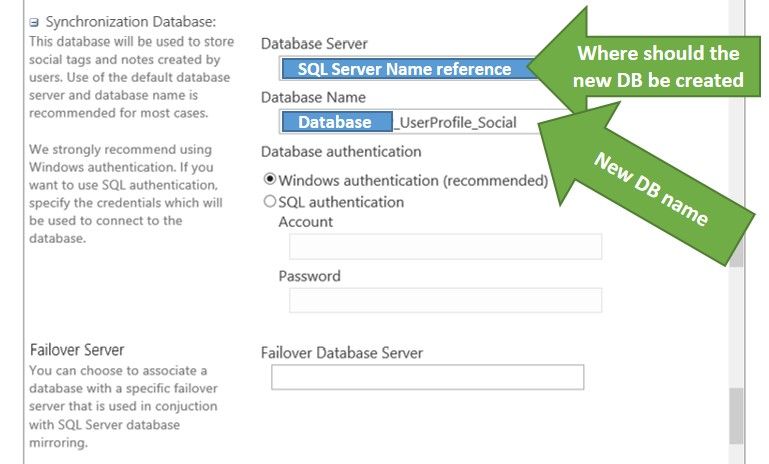
e. Social Tagging Database:
i. Database Server: {SQL Server 2012 Name}
ii. Database Name: {Database}_UserProfile_Social
f. Profile Synchronization Instance: {SharePoint Server Name} (default - current server)

f. My Sites. If you don't have, in this example we done, you can leave it blank, as default.

Click "Create"
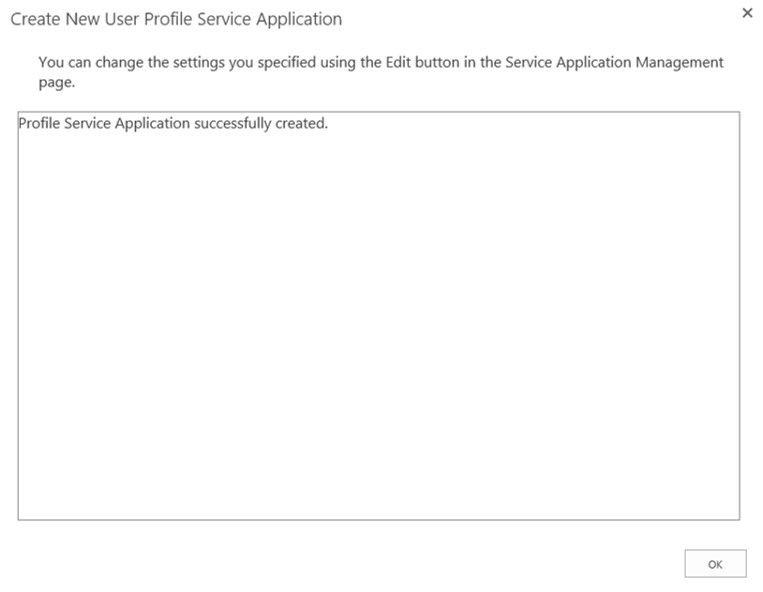
Click "OK"
See full here: User Profile Service Application Settings
Start the User Profile Synchronization Service:
Make sure the SPFarm account has local admin access to the SharePoint Server the UPS synchronisation will be running on. This then needs to be removed once the synchronisation is complete.
Open "Central Administration"
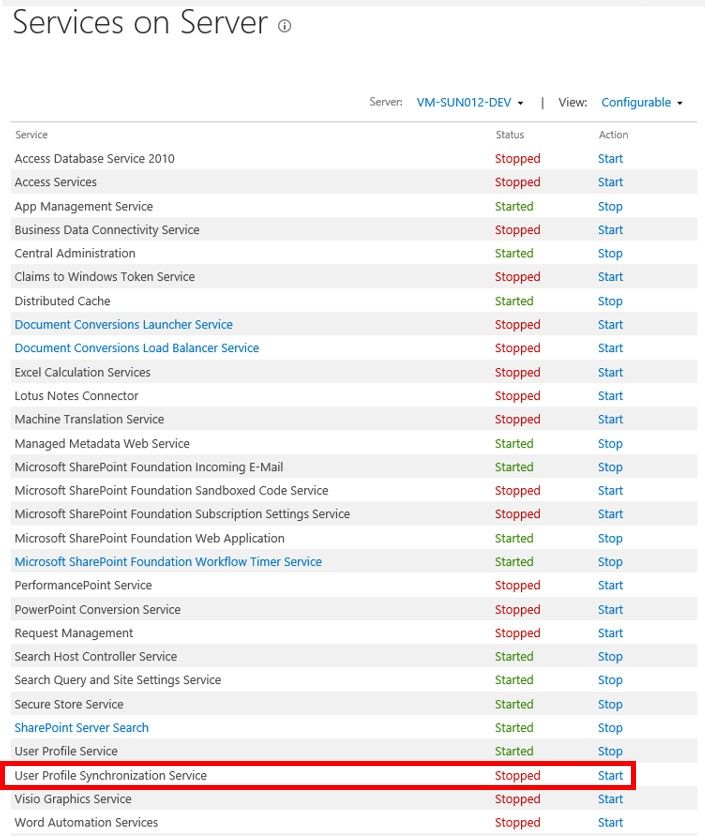
Click “Manage services on server”, under “System Settings”
Find "User Profile Synchronization Service"
Click "Start", on the right
Fill in the Share Point Farm account
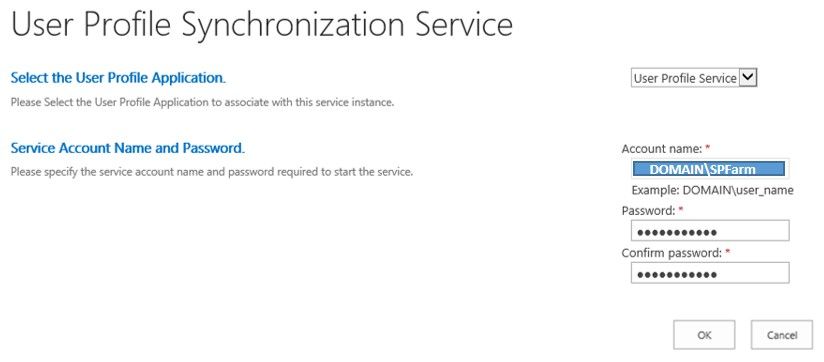
Click "OK"
Reset the IIS:
Open "Command Prompt", as Administrator
Type and enter: iisreset
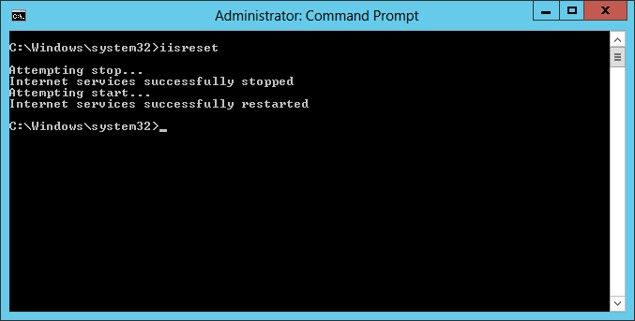
Close "Command Prompt"
Create the Profile Synchronization Connection:
Open "Central Administration"
Click “Manage service applications”, under “Application Management”
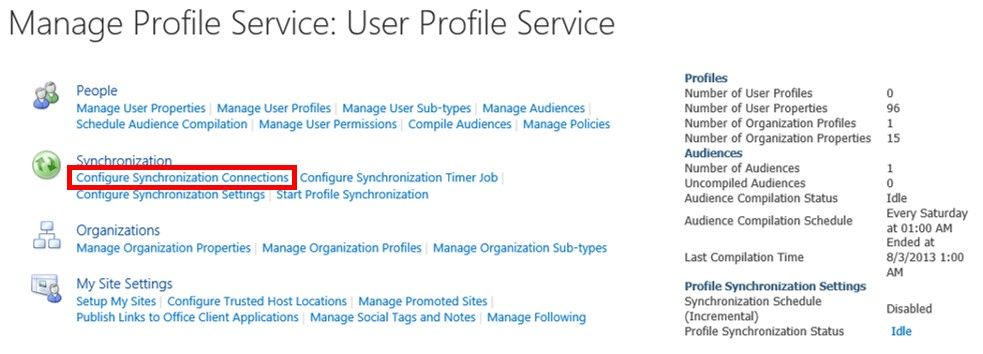
Find and Select "User Profile Service"
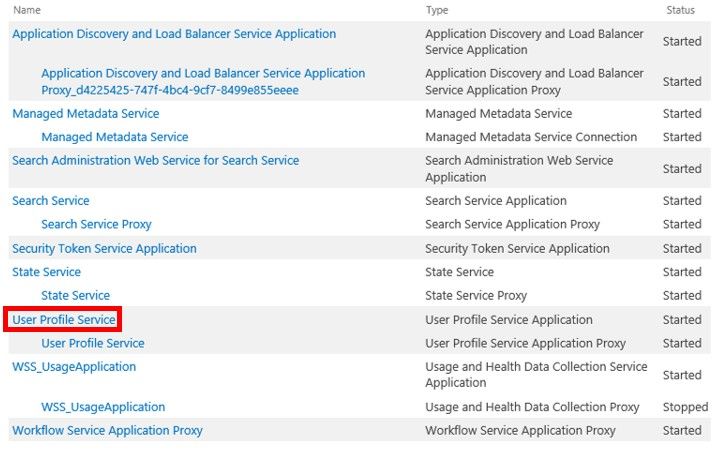
Click "Configure Synchronization Connection", under Synchronization
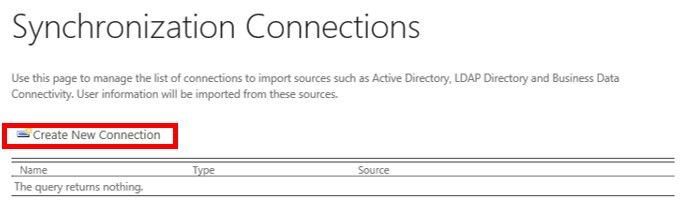
Click "Create New Connection"
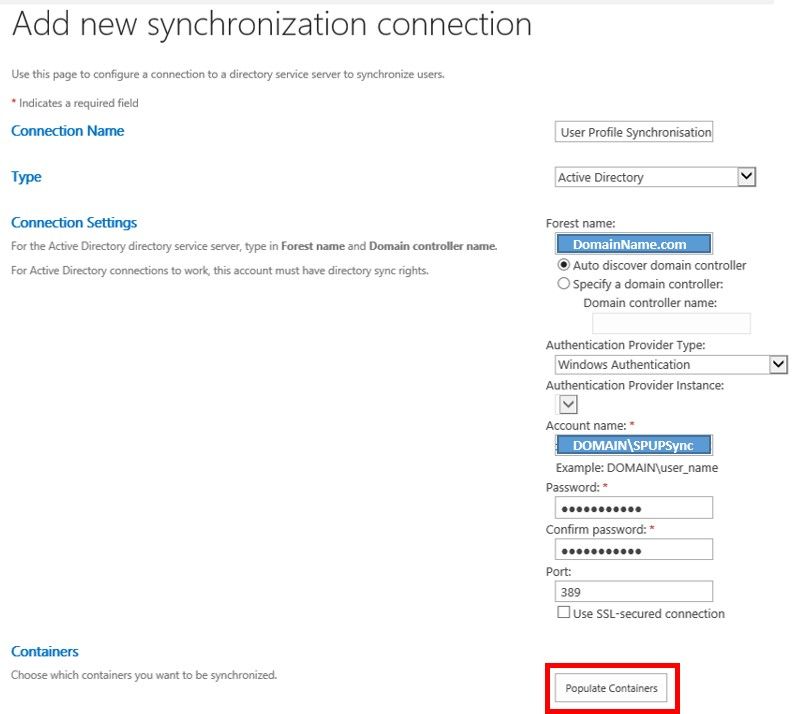
Fill in the related fields
(If I haven't mentioned the field, i have left in the default settings.)
a. Connection Name: User Profile Synchronisation
b. Forest name: {DomainName.com} or {DomainName.local}
c. Account Name: Share Point UPSync account
This account must have "Directory replication rights" in AD (active directory)
d. Click "Populate Container"
e. Select the User Accounts you want to add
f. Click "OK"
Start the Profile Synchronization for the first time:
Open "Central Administration"
Click “Manage service applications”, under “Application Management”
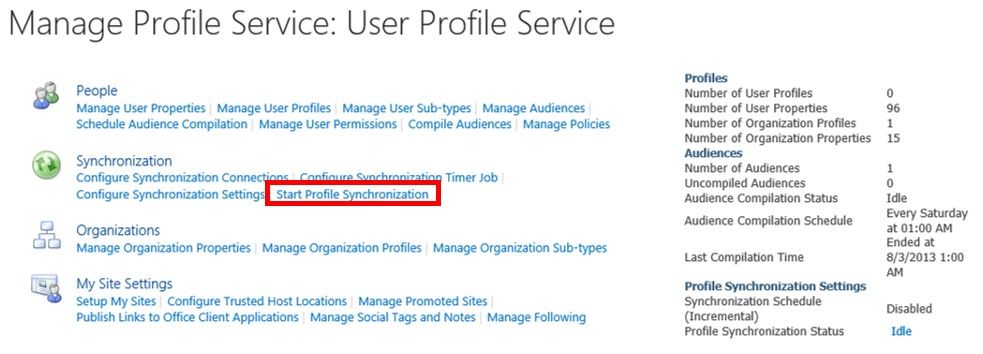
Find and Select "User Profile Service"
Click "Start Profile Synchronization", under Synchronization
Select "Start Full Synchronization"
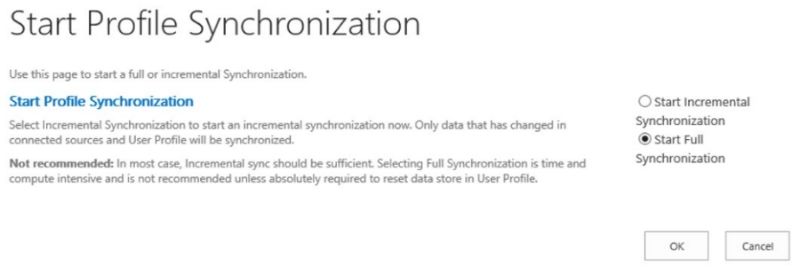
Click "OK"
This will take a few minuets
********* Updated because Unable to get some of the profile values *************
Check the following table
https://technet.microsoft.com/en-us/library/hh147510.aspx
and check the following process for update the mapping
if you want to conifgure the user profile here is the steps
Original Post
http://jaxsharepoint.blogspot.com/2013/08/setup-and-start-sharepoint-2013-user.html
Pre-request Items need to be check
SharePoint Timer service run with local administrator account
The Pool account & FIM service account must have the Active Directory "Replicating Directory Changes"
To make sure your user have Replicating Directory Changes have a permission use the below 10 steps
//Start Process here
Setting permissions by using the ACL editor
1. Open the Active Directory Users and Computers snap-in
2. On the View menu, click Advanced Features.
3. Right-click the domain object, such as "company.com", and then click Properties.
4. On the Security tab, if the desired user account is not listed, click Add; if the desired user account is listed, proceed to step 7.
5. In the Select Users, Computers, or Groups dialog box, select the desired user account, and then click Add.
6. Click OK to return to the Properties dialog box.
7. Click the desired user account.
8. Click to select the Replicating Directory Changes check box from the list.
9. Click Apply, and then click OK.
10. Close the snap-in.
//End Process here
Setup and Start the SharePoint 2013 User Profile Service (UPS)
Verify the FIM service by using this tool
C:\Program Files\Microsoft Office Servers\14.0\Synchronization Service\UIShell\miisclient.exe
Start the User Profile Service:
Open "Central Administration"
Login as the SharePoint Install account
This account must have dbcreate and securityadmin server roles on the SQL Server {SQL Server 2012 Name}
Click “Manage services on server”, under “System Settings”

Find "User Profile Service"
Click "Start", on the right

Create the User Profile Service (UPS) Application:
Open "Central Administration"
Click “Manage service applications”, under “Application Management”

Click "New"

Select "User Profile Service Application"

Fill in the related fields
(If I haven't mentioned the field, it has the default settings)
a. Name: User Profile Service
b. Application Pool: Use existing application pool: Shared Services

c. Profile Database:
i. Database Server: {SQL Server 2012 Name}
ii. Database Name: {Database}_UserProfile

d. Synchronization Database:
i. Database Server: {SQL Server 2012 Name}
ii. Database Name: {Database}_UserProfile_Sync

e. Social Tagging Database:
i. Database Server: {SQL Server 2012 Name}
ii. Database Name: {Database}_UserProfile_Social

f. Profile Synchronization Instance: {SharePoint Server Name} (default - current server)

f. My Sites. If you don't have, in this example we done, you can leave it blank, as default.

Click "Create"

Click "OK"
See full here: User Profile Service Application Settings
Start the User Profile Synchronization Service:
Make sure the SPFarm account has local admin access to the SharePoint Server the UPS synchronisation will be running on. This then needs to be removed once the synchronisation is complete.
Open "Central Administration"
Click “Manage services on server”, under “System Settings”
Find "User Profile Synchronization Service"
Click "Start", on the right

Fill in the Share Point Farm account

Click "OK"
Reset the IIS:
Open "Command Prompt", as Administrator
Type and enter: iisreset

Close "Command Prompt"
Create the Profile Synchronization Connection:
Open "Central Administration"
Click “Manage service applications”, under “Application Management”
Find and Select "User Profile Service"

Click "Configure Synchronization Connection", under Synchronization

Click "Create New Connection"

Fill in the related fields
(If I haven't mentioned the field, i have left in the default settings.)
a. Connection Name: User Profile Synchronisation
b. Forest name: {DomainName.com} or {DomainName.local}
c. Account Name: Share Point UPSync account
This account must have "Directory replication rights" in AD (active directory)
d. Click "Populate Container"

e. Select the User Accounts you want to add
f. Click "OK"
Start the Profile Synchronization for the first time:
Open "Central Administration"
Click “Manage service applications”, under “Application Management”
Find and Select "User Profile Service"
Click "Start Profile Synchronization", under Synchronization

Select "Start Full Synchronization"

Click "OK"
This will take a few minuets
********* Updated because Unable to get some of the profile values *************
Check the following table
https://technet.microsoft.com/en-us/library/hh147510.aspx
and check the following process for update the mapping
- Launch Central Administration.
- Go to: Application Management > Service Applications > Manage service applications > User Profile Service > Manage User Properties.
- Scroll down to the Contact Information section and then look for Work email.
- Hover the cursor over the Work email field, to expose the drop down, and then select Edit from this drop down.
- Scroll down to the Property Mapping for Synchronization section.
- Click the Remove button.
- In the Add New Mapping section, select mail from the Attribute drop down.
- Click the Add button. A new entry will appear in the Property Mapping for Synchronization.
- Click OK.
- Go to: Go to: Application Management > Service Applications > Manage service applications > User Profile Service.
- In the Synchronization section, click Start Profile Synchronization.
- After this completes, wait an additional hour before engaging in any significant testing of alert creation.
Regards
Rashid Imran Bilgrami
This concept is a good way to enhance the knowledge thanks for sharing..
ReplyDeleteSharePoint Training
SharePoint Online Training
Good post and informative. Thank you very much for sharing this good article, it was so good to read and useful to improve my knowledge as updated, keep blogging.yours blog was excellent and really enjoyed.Thanks for sharing and mainting blogging
ReplyDeleteoracle training in chennai
oracle training institute in chennai
oracle training in bangalore
oracle training in hyderabad
oracle training
oracle online training
hadoop training in chennai
hadoop training in bangalore