Hi
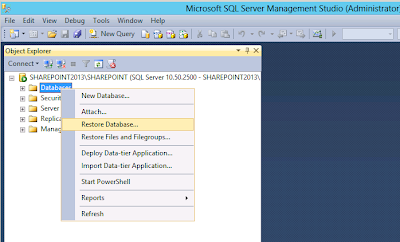
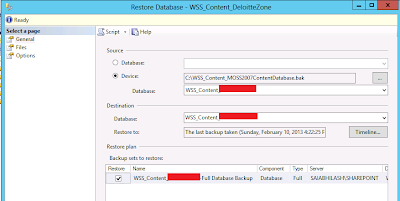
2. Restore the SharePoint 2010 Content database in SQL Server 2012
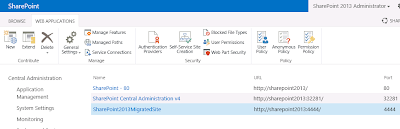
3. Create a claims based web application. I want to use windows authentication. So I have selected “Enable Windows Authentication” checkbox while creating new web application.

By default it's selected
4. Note that classic authentication mode is removed by default in create web application page. You can create classic web application using PowerShell only. (Not need this step)
5. We see that web application is created in Central Administration page
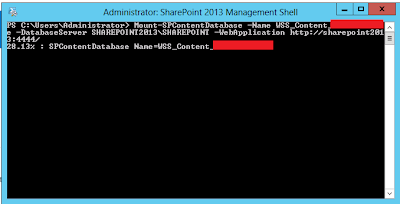
6. Open “SharePoint 2013 Management Shell” as Administrator
Today i completely transfer the SharePoint 2010 to SharePoint 2013. I hope my post also help you i add few comments which is missing in the original post.
Preferable Process
http://www.brightworksupport.com/migrate/
Alternative Process
In this post, I will show how to migrate sites from SharePoint 2010 to SharePoint 2013.
Steps for Migrating SharePoint 2010 site to SharePoint 2013
1. Take backup of SharePoint 2010 Content database
Steps for Migrating SharePoint 2010 site to SharePoint 2013
1. Take backup of SharePoint 2010 Content database
Right click on the database name > TASK > Backup
2. Restore the SharePoint 2010 Content database in SQL Server 2012


3. Create a claims based web application. I want to use windows authentication. So I have selected “Enable Windows Authentication” checkbox while creating new web application.

By default it's selected
4. Note that classic authentication mode is removed by default in create web application page. You can create classic web application using PowerShell only. (Not need this step)
5. We see that web application is created in Central Administration page

6. Open “SharePoint 2013 Management Shell” as Administrator
7. Detach the content database for the newly created web application using the below PowerShell command
Dismount-SPContentDatabase -Identity "WSS_Content_SharePoint2013DB_4444"


8. Attach the Restored SP2010 Content database to the newly created SP2013 Web Application using PowerShell command
Mount-SPContentDatabase -Name WSS_Content_SharePoint2010ContentDatabase -DatabaseServer SHAREPOINT2013\SHAREPOINT -WebApplicationhttp://sharepoint2013:4444/
9. Depending on your project requirements, you may need to perform additional tasks
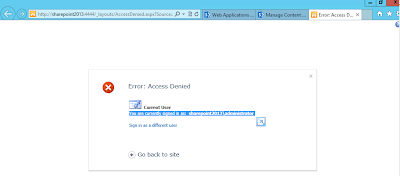
Note: In my case it gives an different SharePoint error and once i refresh it will work fine
11. This is because the content database has got primary and secondary administrators of SharePoint 2010 site. This is not valid in my case since SharePoint 2013 is on another domain as shown below
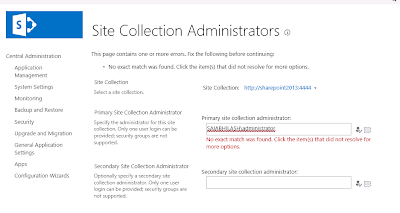
12. Hence, I need to change the primary and secondary administrators to valid users as shown below and click OK to save changes
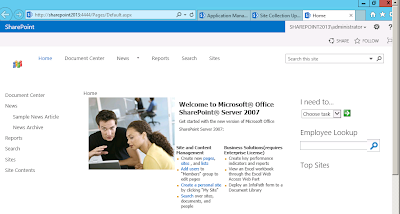
13. Welcome to your SharePoint 2013 Site! :)

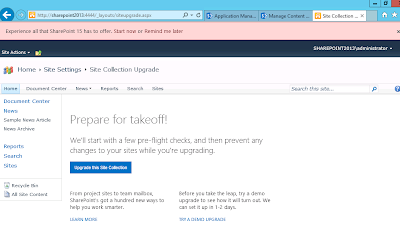
14. Note that we are still in SharePoint 2010 UI. We also got a message to experience SharePoint 15 features. Click Start now
15. We get an “Upgrade Site Collection” page. Click “Upgrade this site collection”
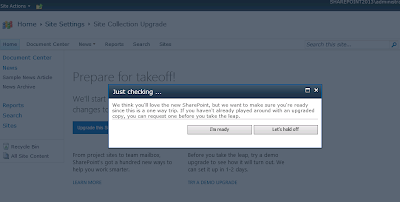
16. We get a popup. Click “I am ready”. Note that in SharePoint 2010 Visual upgrade, even though the site has been updated to SharePoint 2010 UI, we can still revert back to SharePoint 2007 UI using PowerShell. This is not the case with SharePoint 2013. Once the site is converted to SharePoint 2013, this cannot be reverted back to SharePoint 2010.
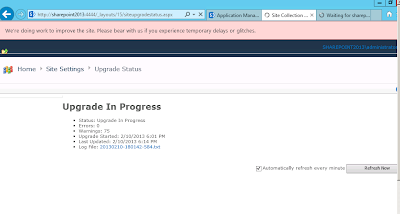
17. You can see the upgrade status in Site Upgrade Status page
(http://<SiteUrl>/_layouts/15/siteupgradestatus.aspx)
Note: In my case it's showing the wizard for 7 steps
Upgrade Screen 1
Upgrade Screen 2
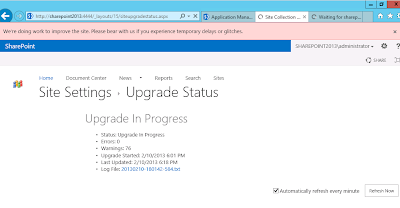
18. Once, the upgrade is completed, we get a Upgrade Successful message

Mount-SPContentDatabase -Name WSS_Content_SharePoint2010ContentDatabase -DatabaseServer SHAREPOINT2013\SHAREPOINT -WebApplicationhttp://sharepoint2013:4444/

9. Depending on your project requirements, you may need to perform additional tasks
- Update Web.config with
- Connection strings to database (In case custom database is used)
- Safe controls for Dll’s
- Update Visual Studio code to VS 2010 (Applicable if 14 hive was used by your code. This needs to updated to 15 hive)
- Update master page and page layouts to use dll’s of version 15.0.0.0. Note that we still have 14.0.0.0 version for Master page and Page layouts even after migration
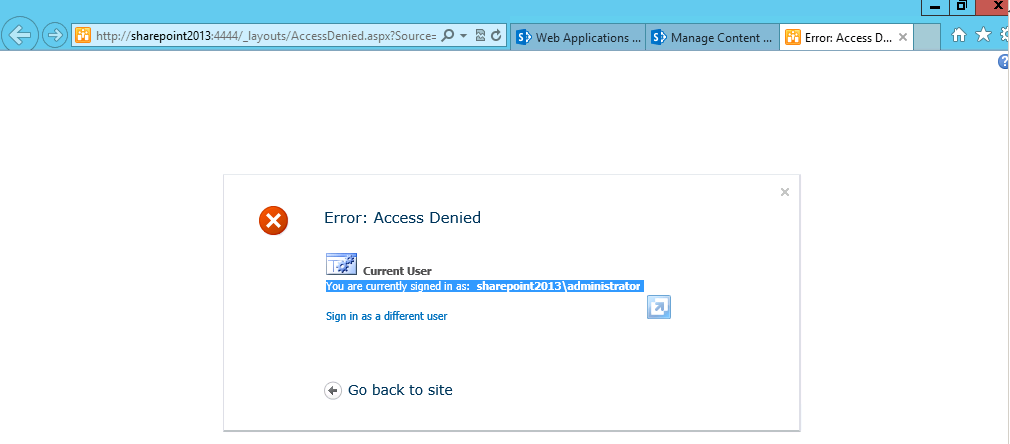
Note: In my case it gives an different SharePoint error and once i refresh it will work fine
11. This is because the content database has got primary and secondary administrators of SharePoint 2010 site. This is not valid in my case since SharePoint 2013 is on another domain as shown below

12. Hence, I need to change the primary and secondary administrators to valid users as shown below and click OK to save changes
13. Welcome to your SharePoint 2013 Site! :)

14. Note that we are still in SharePoint 2010 UI. We also got a message to experience SharePoint 15 features. Click Start now
15. We get an “Upgrade Site Collection” page. Click “Upgrade this site collection”

16. We get a popup. Click “I am ready”. Note that in SharePoint 2010 Visual upgrade, even though the site has been updated to SharePoint 2010 UI, we can still revert back to SharePoint 2007 UI using PowerShell. This is not the case with SharePoint 2013. Once the site is converted to SharePoint 2013, this cannot be reverted back to SharePoint 2010.

17. You can see the upgrade status in Site Upgrade Status page
(http://<SiteUrl>/_layouts/15/siteupgradestatus.aspx)
Note: In my case it's showing the wizard for 7 steps
Upgrade Screen 1

Upgrade Screen 2

18. Once, the upgrade is completed, we get a Upgrade Successful message

Note: in my case it required more time and display the updates one by one after some time so you need to be patient
19. And, finally, here is our SharePoint 2013 site! :)
20. Everything got migrated properly without any issues. Best visualization to the Microsoft SharePoint team for doing such an excellent job. Cheers!
19. And, finally, here is our SharePoint 2013 site! :)

20. Everything got migrated properly without any issues. Best visualization to the Microsoft SharePoint team for doing such an excellent job. Cheers!
Original Ref:
http://saiabhilash.blogspot.com/2013/02/step-by-step-procedure-to-migrate-sites_10.html
Rashid Imran Bilgrami
CEO Best visualization
Comments
Post a Comment